DNS Protection for Hosted DNS and Websites
This is a good topic to discuss. It can be particularly difficult as well if you are unfamiliar with how it works. Cloudflare is awesome because it acts as an additional layer of protection. It is essentially a proxy firewall for your web-hosted services. If you use a provider like namecheap or GoDaddy it is fairy simple to just point everything over to cloudflare. You can also self-host your own server. In this scenario, specific to my use, I will be showing how to do this by forwarding all DNS from Namecheap to Cloudflare. I also have sub domains that point to internally hosted servers utilizing pfsense and HA Proxy. If you are not hosting any internal servers, your job is going to be pretty easy. Don’t worry, adding it to pfsense HA proxy wont be so bad either. I will post a link to a video that shows you how to initially set up HA proxy. This guide will just show you how to correctly integrate cloudflare so you can successfully get a valid SSL cert from Letsencrypt.
What You Need:
- pfsense Firewall – (Reachable by Internet)
- HA Proxy package installed
- namecheap Account
- Domain Name
- Word Press Hosted Website or other service
- cloudflare account (free)
Create or Login into Cloudflare
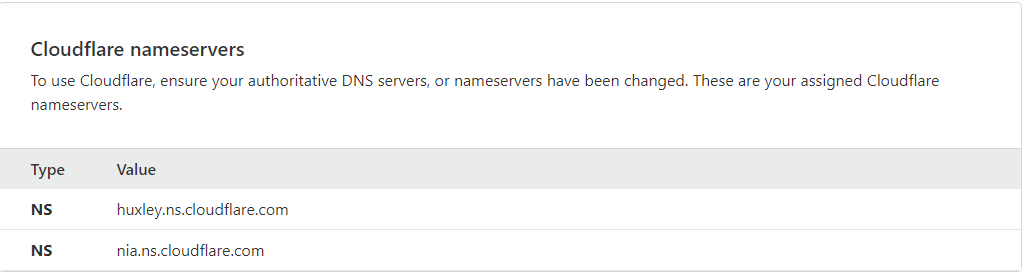
You may already have a cloudflare account, and that is great. If not, it just takes a few minutes to do so, but once you do, you will need to add your domain name to the account. Cloudflare should give you domain servers to have you add to namecheap. See the screenshot below for an example.
NOTE** You more than likely will have different name servers, so do not just blindly use what you see in the screenshot
Add a Site

My site has already been added, but once you add the DNS it gives you to add to namecheap, it will scan for the DNS Records
Cloudflare DNS Nameservers
You will now log into your name cheap account and add those Name servers under custom DNS in namecheap. Once you log into your name cheap account you need to go to domain list and click your manage for the correct and active domain name that your services (if any) are hosted on.
Namecheap Dashboard
Cloudflare will scan name cheap and import Records
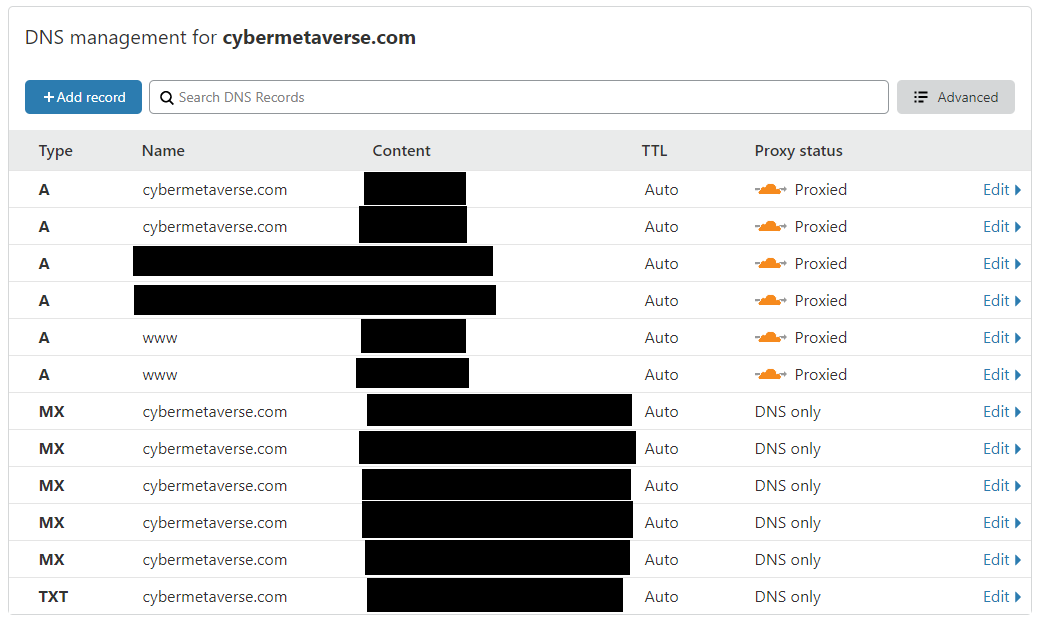
Once you point name cheap to cloudflare and it imports the DNS records, then it will take a little bit of time before you site and DNS will start working again. Cloudflare will email you telling you that everything is has completed. Your website is not transferred, just DNS records. Namecheap will still be hosting your web server (if you have one). You should see something similar to the picture below.
Example DNS Records
Not Hosting any internal Servers?
If you are not hosting anything internal, then the rest of this guide won’t really help you in any way. You can enjoy your cloudflare protected setup.
Are you Hosting any internal Servers?
If so, then you will want to watch the the video on how to set up an HA Proxy
Configuring the ACME Certificate for HA Proxy
From here you will want to log into pfSense and click on Services -> Acme Certificates. You will add the new certificate using cloudflare for Letsencrpyt to authenticate to. You will a few APIs from your cloudflare account. You can reference the picture below. Then we will walk through how to get those APIs. The one that will be the more difficult (still easy) but takes more steps to get.
Acme Certificate for whatever self-hosted server you are running.

Obtaining all the APIs you need from Cloudflare
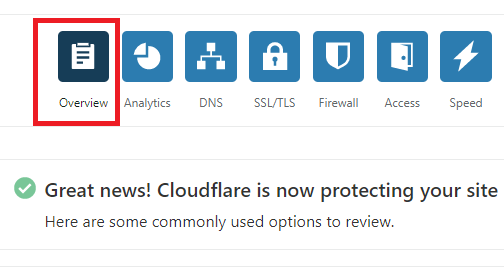
There are a couple of easy wins right off the bat. Hopefully, the email address you used to sign up for cloudflare is an easy win. When you are in your cloudflare account, click the overview Button if you are not already there. Then you will see the following Easy Wins:
- Email Address
- Zone ID
- Account ID
Overview Button
Easy Win APIs
The Remaining APIs
The last two APIs are not difficult, you just have to do a little bit of extra work. The Cloudflare API key is pretty easy, the token is the one with the extra steps. These are the following APIs you need for pfSense:
- Key
- Token
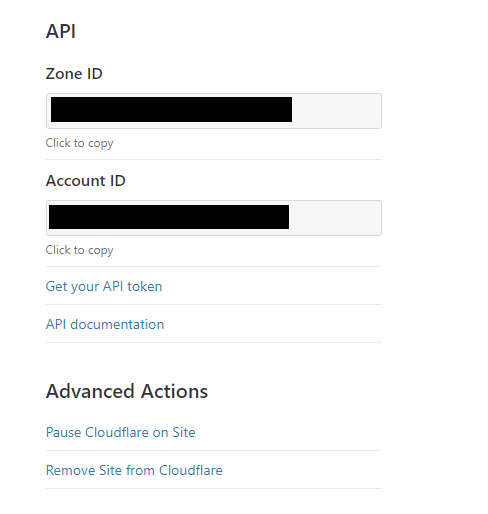
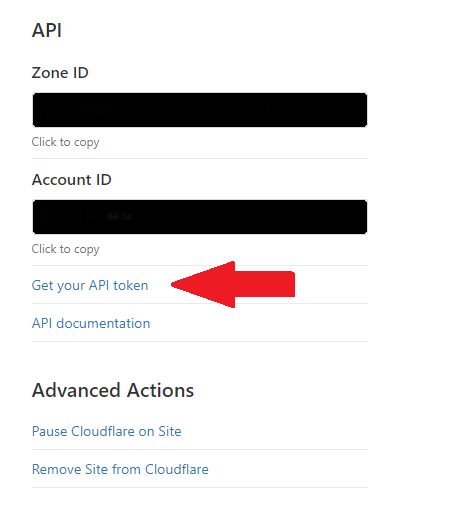
To get your Cloudflare API Key, that is fairly simpe. You will go to overview like you did before, then scroll down to where you got your Zone ID and Account ID, and click a link. See the image below:
Get Your API Token
Once you click Get Your API Token, you will be presented with another link to click which it will ask for your cloudflare account password and have you complete a captach. See the image below:
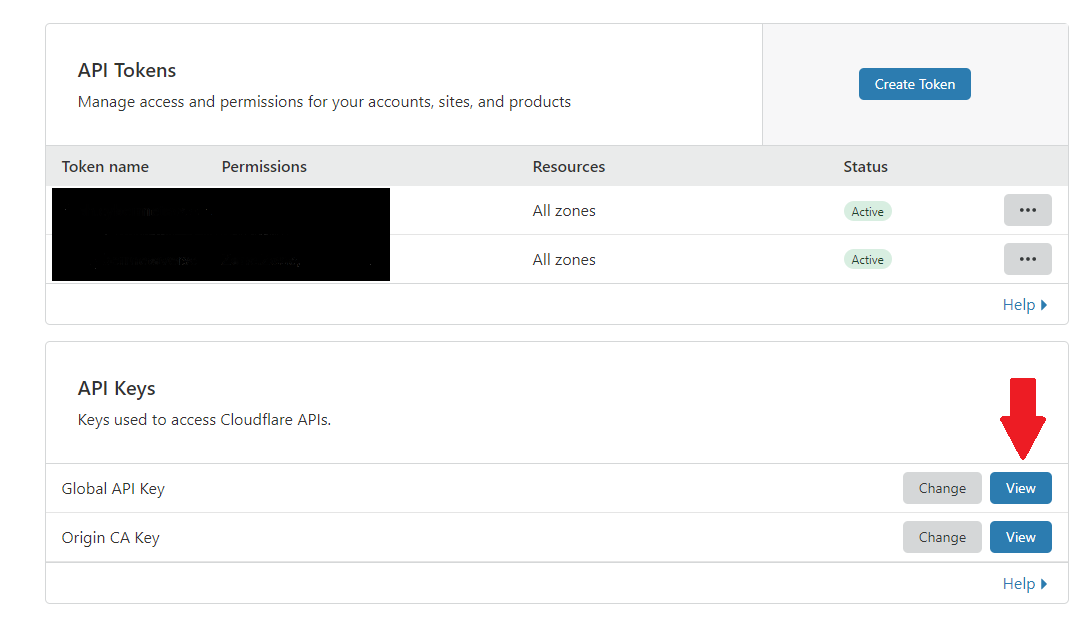
Getting the Token
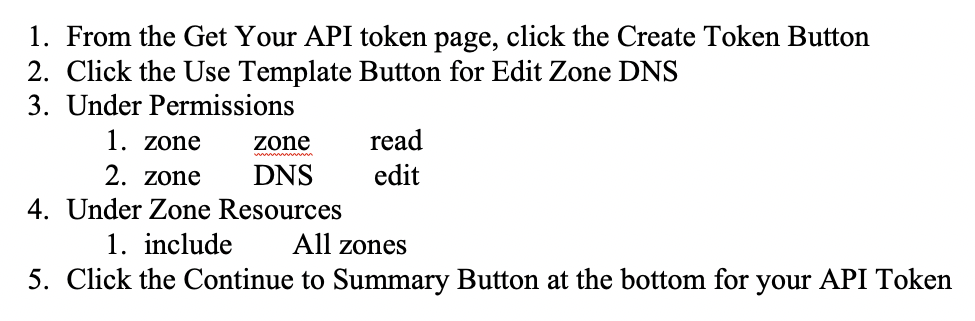
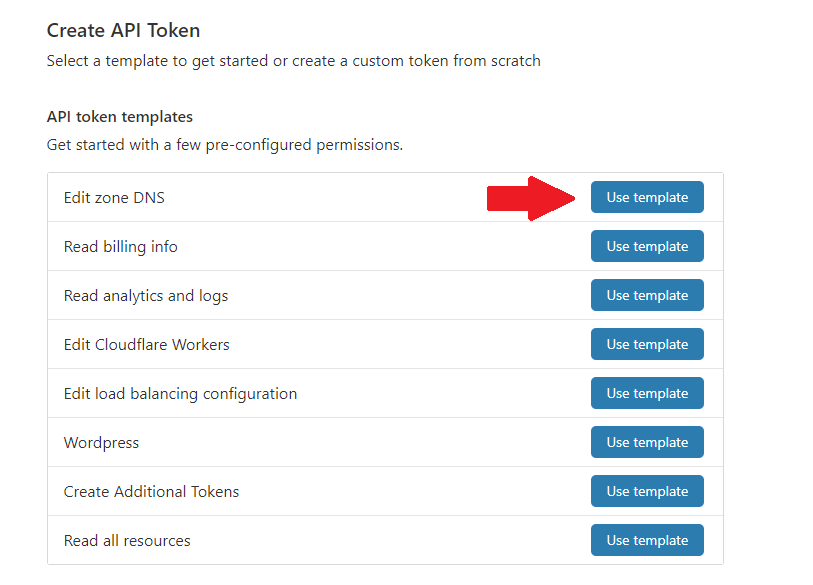
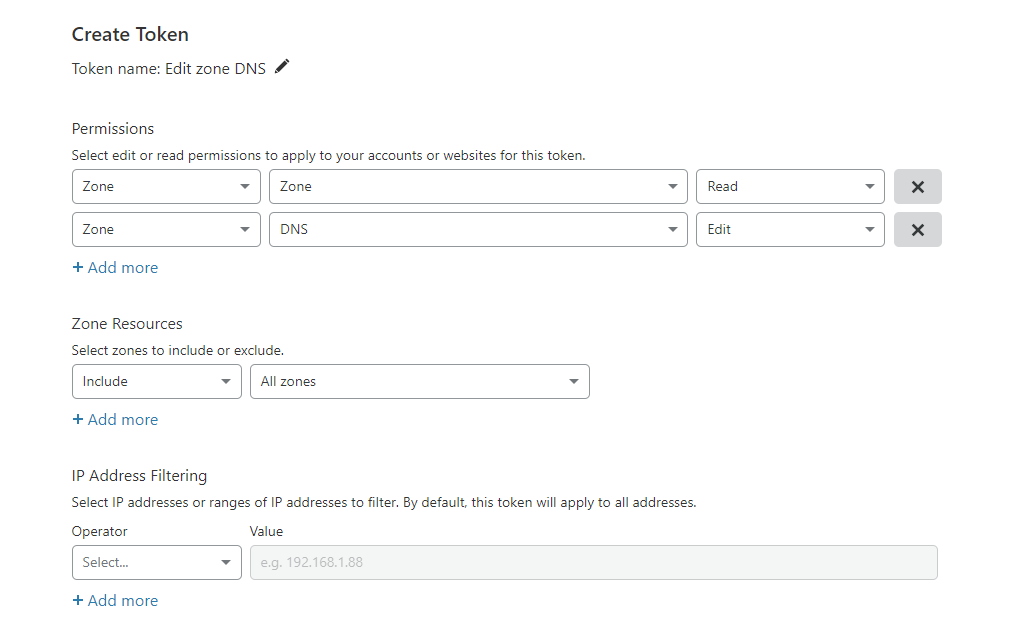
This is the fun one, but seriously, it isn’t bad. You will have a button to click on the same page you just were previously trying to get your API token. You will be creating a token for each of your sub domains. I named each token. Also, it is important you screenshot it or take note of it, because once you close the window, you aren’t able to get it again. If you are a glutton for punishment and want to repeatedly do this step over and over, then that is an option. Anyways, You will click the Create Token button at the top of the page, then you use the Edit zone DNS template. There you will edit the rules, and once complete, you will get your API Token. So, follow the steps below:
Create Token
Edit zone DNS Template
zone DNS Settinds (Permissions and Zone Resources)
FINISHED!
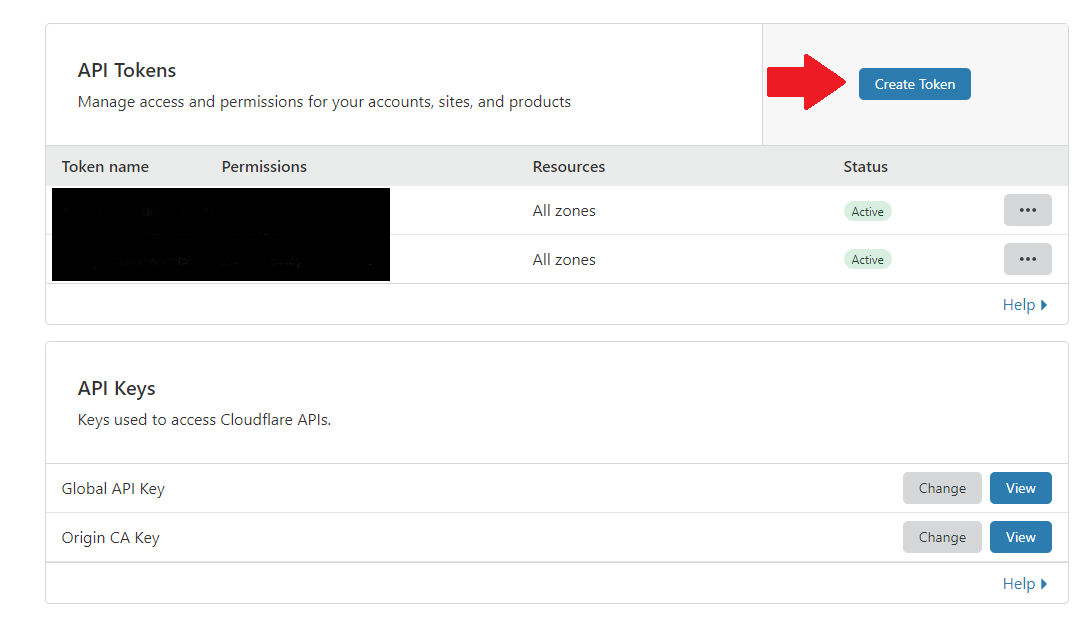
There aren’t any more steps, after hitting the Continue to Summary button, you will be on the page with your API Token. Make sure you copy and paste it into pfSense so you can save the configuration and be protected by cloudflare DNS proxy. I prefer to not have my public IP address exposed, it is all about adding layers of protection to make the process as difficult and as painless as possible for an attacker. I am an unworthy target lol, but I like to feel secure. #Cyber
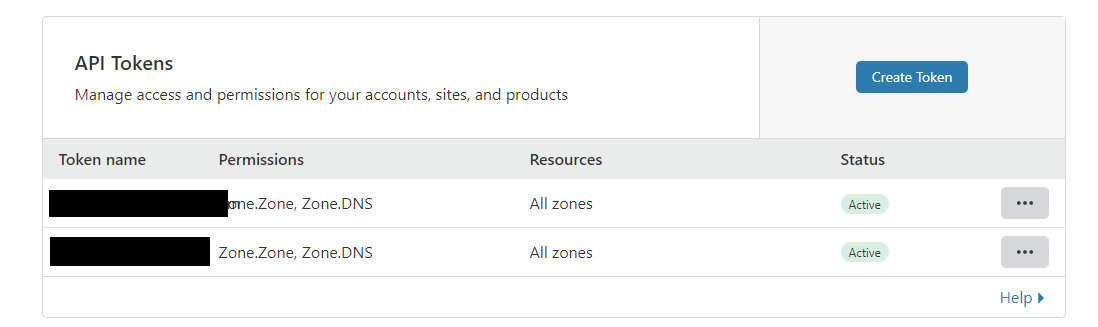
If all went well, you should see active tokens in your account….ENJOY!!
Active API Tokens