You are probably wondering, why would I want to do this? Well for one, its much faster to login and you don’t have to type your password! That’s a huge benefit. Also, what is more difficult to hack? A key or a password? In this situation, sounds like a win win to me. I will go through and cover my use case. There are additional steps that you would do if you were using your identity file form a linux host directly to another Linux host. I will post links for that in this thread, however, I am going to cover my use which is use with SecureCRT. It is a similar process with Putty as well, but you would need the Putty Keygen and there would be a few different steps. This takes a little legwork to get setup, but a little work will pay off with much joy in the end. So here we go..
1. SSH login to the device that you want to SSH to.
2. Assuming you on your user account, not root, verify in your home directory there is a .ssh directory, if not, create it.
1. $mkdir .ssh                   ** Sets rwx for folder owner **

2. $chmod 700 .ssh               ** Required for SSH cert to work**

3. $cd .ssh                      ** Change Directory into .ssh folder

4. $touch authorized_keys        ** Creates Authorized Key file

5. $chmod 600 authorized_keys    ** Sets read/write for folder owner
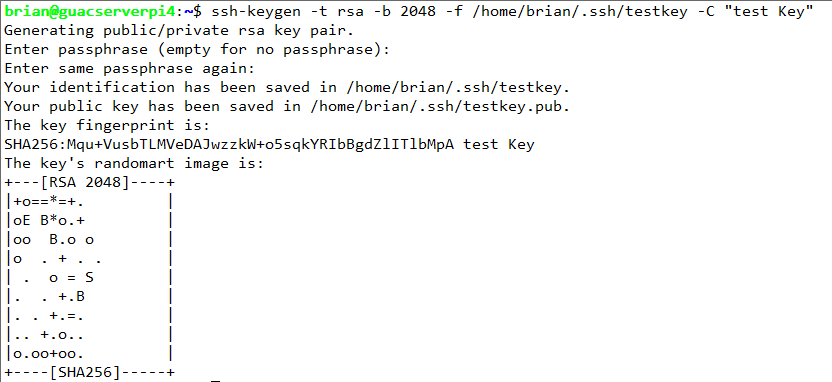
3. Once this is complete, we can create the keys that you will use to SSH with
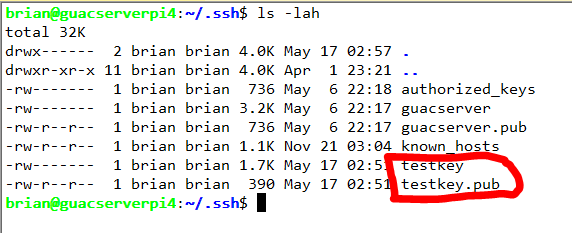
4. For example, we will make a key called testkey$ssh-keygen -t rsa -b 2048 -f /home/brian/.ssh/testkey -C “test Key”
5. From here, (do not close your current ssh terminal window) we can use WinSCP or SecureFX to login into the same device we just created the key and copy the private key file to a directory which you know is safe to maintain the key. You will later need to add this path to SecureCRT for it to use for logging in.
6. Go back to your SSH Terminal window, you will need to append the public key into your authorized_keys file.
7. Verify the key is in your authorized_keys file
Notice that the key that was appended matches the key that is in the keyfile
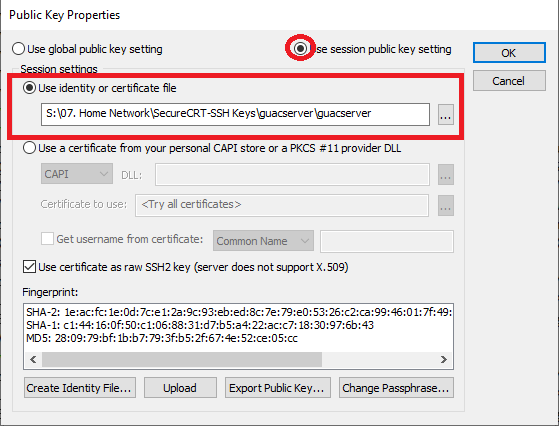
8. Now we must add the private key that we extracted earlier with SecureFX or WinSCP and need to add the path to the Session in Session Manger in SecureCRT
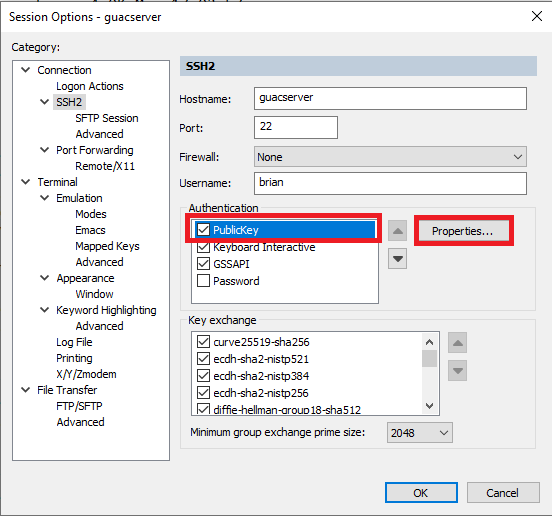
* Open the Session properties from your list in SecureCRT by right clicking on it and hitting properties add the bottom of the menu

* It will open the session properties window as you see below, click on PublicKey and make sure your screen looks like what you see below
- Now navigate to where you stored the private key and select it. It should look like below
- Hit ok and you will be able to login without the need for a password. You will notice above that the password check box was unchecked


