I am using this on Ubuntu 20.04 Live Server and I am using it specifically for an intranet page for shortcuts for lab Management. It is pretty nice and I must say, I am pretty pumped up about the end result thus far.

  1. This guide assumes you have already installed ubuntu server, docker and docker compose are already installed, and it is up and running with internet access. If this is where you are, navigate to Portainer’s Website

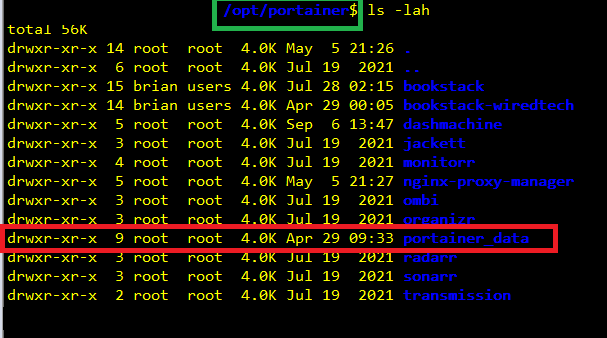
2. First you will want to create the directory where you want to store the container data. (This is not required, but it is my preference)

– Example: The directory I chose to store my data in is below in the code snippet box. Below that will be a view of my portainer directory confirming this configuration

/opt/portainer/portainer_data

3. Run the command from the Portainer Website. Remember, if you created a custom directory, you must modify the command. I will show the default example, and the actual command I used.

Default Portainer Command:

docker run -d -p 8000:8000 -p 9443:9443 — name portainer — restart=always -v /var/run/docker.sock:/var/run/docker.sock -v portainer_data:/data portainer/portainer-ce:latest


The Actual Command I ran:

docker run -d -p 8000:8000 -p 9443:9443 — name=portainer — restart=always -v /var/run/docker.sock:/var/run/docker.sock -v /opt/portainer/portainer_data:/data portainer/portainer-ce:latest

It is important to understand what each of these parts of the command accomplish:

  • -p Specifies port and which port to connect from the host to the container
  • –name Denotes the name of the container that will run
  • –restart always Tells Docker to restart the container after boot
  • -v Denotes the Volume and socket where the Container will tie into the host
  • portainer/portainer-ce  here is where you specify the Author of the container, and the template to pull from the Docker Hub.

4. Logging In
Now that the installation is complete, you can log into your Portainer Server instance by opening a web browser and going to:

https://localhost:9443

Replace localhost with the relevant IP address or FQDN if needed, and adjust the port if you changed it earlier.

You will be presented with the initial setup page for Portainer Server.

5. Initial Setup
Your first user will be an administrator. The username defaults to admin but you can change it if you prefer. The password must be at least 12 characters long and meet the listed password requirements.

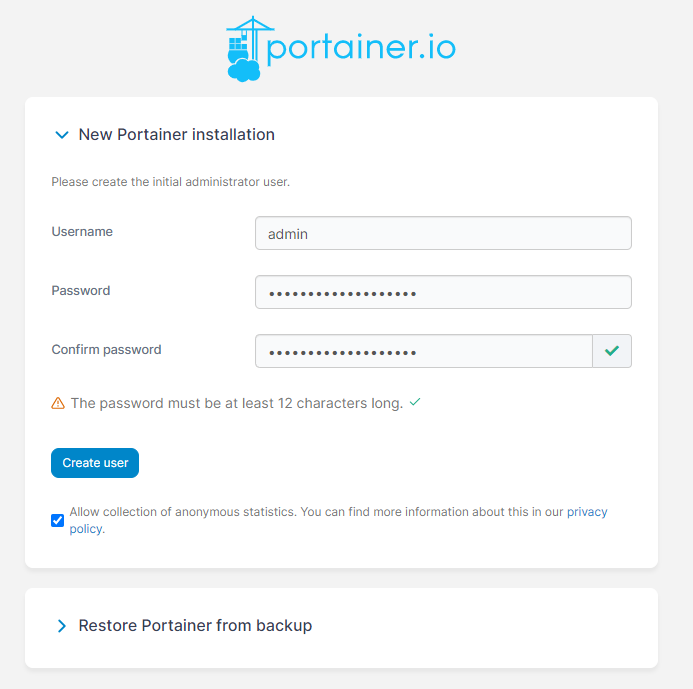
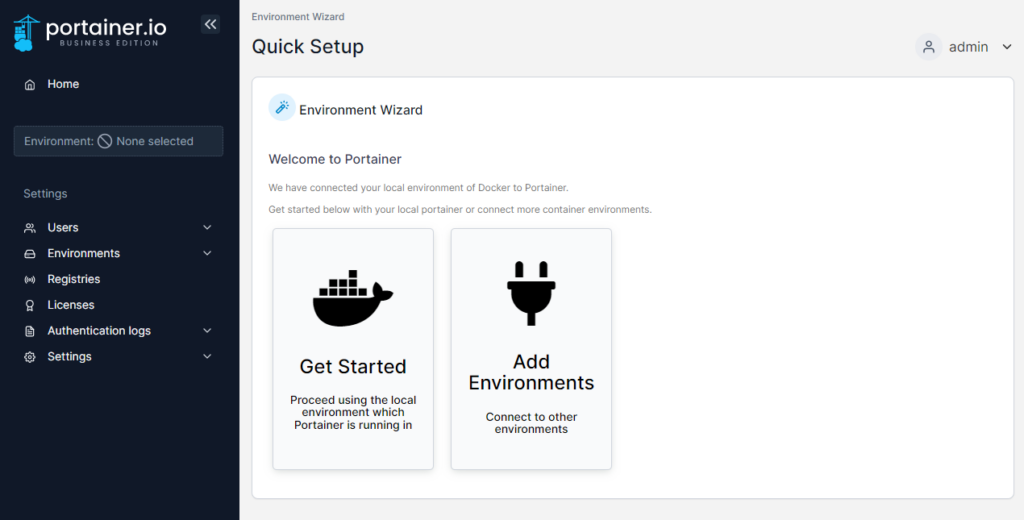
The installation process automatically detects your local environment and sets it up for you. If you want to add additional environments to manage with this Portainer instance, click Add Environments. Otherwise, click Get Started to start using Portainer!

I named my local environment to my liking, you can do the same. Once your local environment is setup, you can do different things like change to a dark theme and customize the overall look. When you login from now on, you should come to a page that looks like this below.

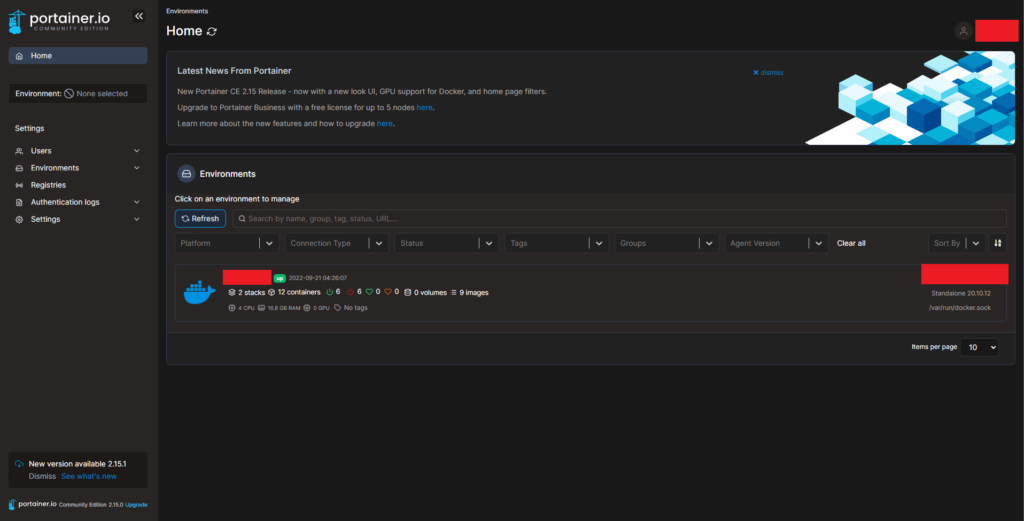
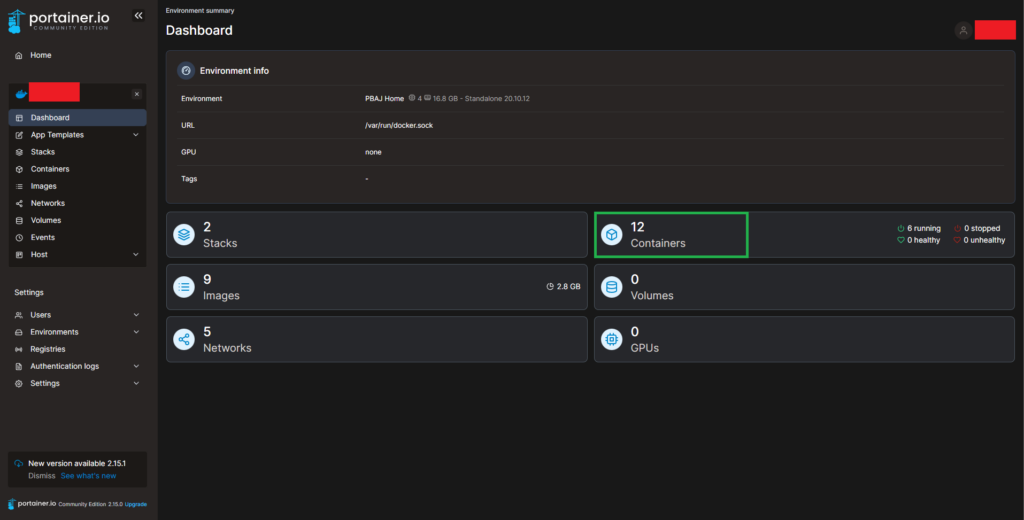
If you click on the Local Environment where it shows the number of stacks and containers, (this should be zero for new installations), It will bring you to the Dashboard where it will give you a better view of your environment. I have an example image below.

You can stop at this point, however, I wanted to show one container that I love to use for Lab management and bookmarking all the pages I use for pretty often for managing my lab environment or access to certain websites.

I use a docker container called Dashmachine.

The developer has taken a break, so there have not been updates for a little while now, but I will share a screenshot of what mine looks like.

THE FINAL PRODUCT (Awesome Lab Management)