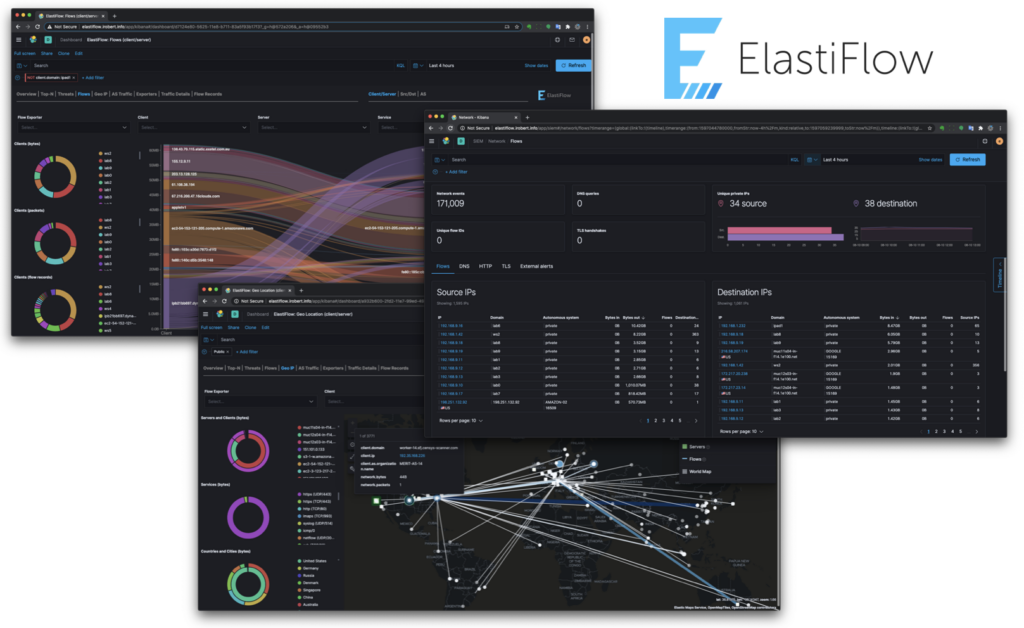
If you are looking for a way to see what is going on in your network, Elaistiflow is an amazing tool that will allow you to do this. There are several ways you can do this, whether it is a baremetal server, virtual machine, laptop or Desktop device, you have plenty of options. This guide will cover setting it up in a virtual environment. I am running this server in esxi, however, this guide is going to only cover post installation of ubuntu 20.04.1 LTS.

General Information
During this process you will want to head over to Elastiflow’s Github page for more information about elastiflow. There are several resources that you will need. There are several readme’s that you will find useful to include a link to the latest version of Elastiflow. Running this in a docker container makes it much easier on you to get up and running, plus, it makes it much easier for you to perform system upgrades and install security patches without worrying as much about breaking the installation. After you build it enough times, you can essentially template it out.
System Requirements
Below I am going to post some system requirements. You can find this same information which will give you more information. In this scenario, I am running this from home, so the demand for me will not be to bad.
My Setup
- 6x CPUs
- 32 GB RAM
- 500GB Hard Drive Storage
- Ubuntu 20.04
- Docker
- Virtual Machine on esxi
Hardware Requirements

Installation and Setup Process
Before you start downloading the elastiflow zip that you will need, here are a few things you will want to do first when you are booted up into ubuntu server. Keep in mind, I am running ubuntu server and do not run the Graphical Desktop Environment. So here we go.
**Note – You can do sudo if you want, but I ran everything as root cause I aways seem to forget to type sudo.
sudo apt update && sudo apt upgrade -ysudo apt install docker.iosudo apt install docker-composesudo apt install nginxsudo apt install unzipsudo mkdir /var/lib/elastiflow_es && sudo chown -R 1000:1000 /var/lib/elastiflow_es
After running the above commands you need to download the latest version of ElastiFlow by using wget. I will make some recommendations for this part of the process.
cd /optwget https://github.com/robcowart/elastiflow/archive/v4.0.1.zip- **This is currently the latest stable release as 20 Dec 20
unzip v4.0.1.zipcd elastiflow-4.0.1
After completing all the above steps, you should be in the /opt/elastiflow-4.0.1 directory and you should see something similar to the picture below.

docker-compose.yml
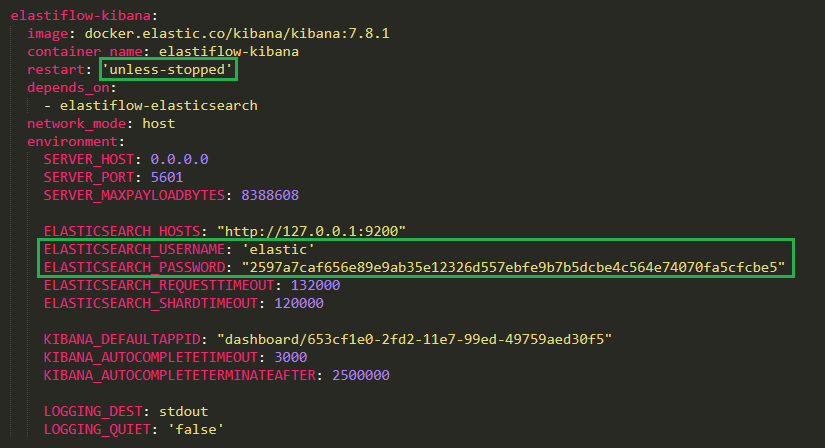
I am going to share screenshots of my docker-compose.yml with green boxes that highlight the changes I made. Keep in mind, this is tailored to the CPUs, RAM that I chose and also at the bottom, I am ingesting netflow on port 9995. Default port for that is 2055. These settings need to be adjusted to your environment. Please see the screenshots below
FYI: The password you see, is randompassword that was hashed. This password you will to log into kibana one time, but will have the ability to add your own user. I prefer this method since it is a long random hash, not personal to you and wont be needed. Feel free to do whatever method you want, I am just putting that information out.
elastisearch container

Kibana container

logstash container

Deploy the Containers
After double checking to make sure everything is to your liking, it is time to spin up these containers. make sure you are in the /opt/elastiflow-4.0.1 folder.
sudo docker-compose up -d
From this point, it will take a few minutes depending on your internet connection, but it roughly 600-900 MBs from what I remember. You will see once the task is complete. Now, you need to verify that the containers are up.
sudo docker ps

The above output is what you should see. We are almost finished with getting the docker containers to fully working. You password that is set in the configuration file is not fully active yet. You will be unable to login until you get a shell in the elastic container and run the elastic-setup-passwords script. In order to do this, you just need to run the following command to shell in.
docker exec -ti elastiflow-elasticsearch /bin/bash
You will have a shell inside of your docker container elasticsearch. This is where you will run the above mentioned password script. Do the following:
cd config/elasticsearch-setup-passwords interactivetype y (for yes)paste the password from the yml fileYou will have to do this several times. You are entering the password then confirming each time it asks.
exit
I have already done this, so I am not going to run it again. Just make sure you exit back to your host machine. You do not need to restart the container.
Test Logging into Kibana
If you navigate to https://your-ip-address:5601, then you should be able to login with the username and password below
- elastic
- 2597a7caf656e89e9ab35e12326d557ebfe9b7b5dcbe4c564e74070fa5cfcbe5
Finished (Unless you want NGINX with HTTPS, and hardening the firewall)
At this time, you do not have to go any further unless you want to. I preferred to limit access to my box via ufw firewall, which is simple to set up, and to have it connect via HTTPs. I am just not a fan of insecure protocols, however, this is at home and it is for personal use. I do not recommend keeping it as it is, and if you wish to add a little security, then continue proceed to Securing Elastiflow Server on Ubuntu 20.04.1 LTS
Don’t Forget to Add the Dashboards
The dashboards are not loaded by default. Make sure y0u download them from Elasitflow’s github page inside the kibana folder!
