Deployment Steps
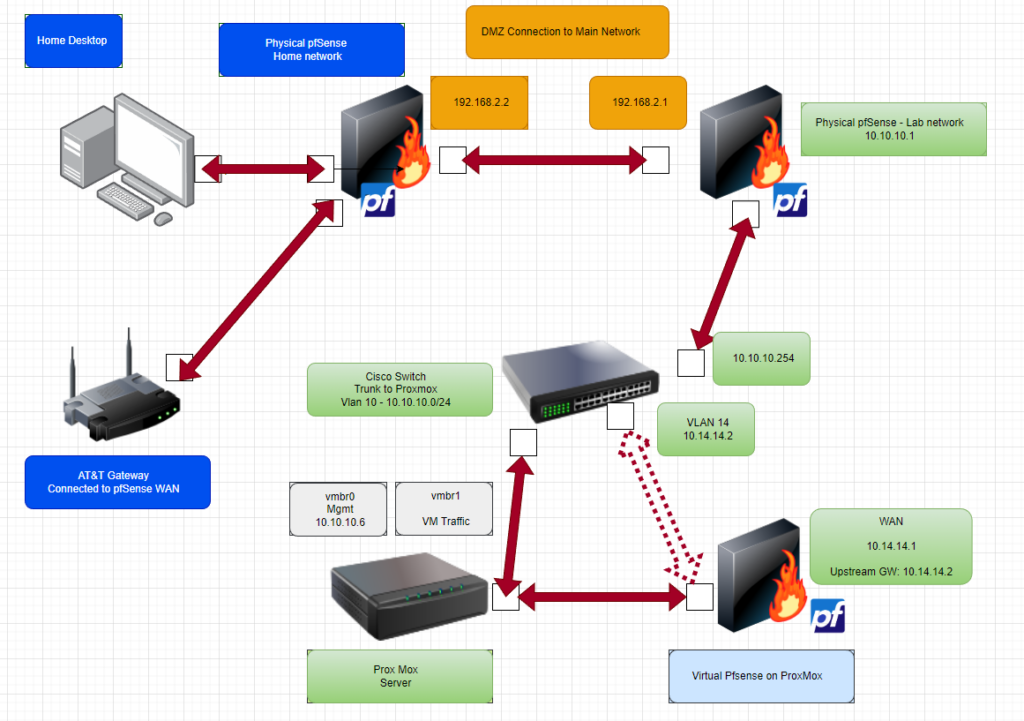
This guide will help you deploy ProxMox utilizing vlan aware utilizing linux bridges. It is not as bad as it sounds. I will attach a network map to give you an idea of how my infrastructure is set up and some of the system specs that I am running this on. This guide is not meant to help you create a bootable USB and configure server hardware. This guide is under the assumption you have intially booted your server successfully already running ProxMox. At the time of this post, the version of ProxMox used was version 7.2

Configuring The Network Interfaces
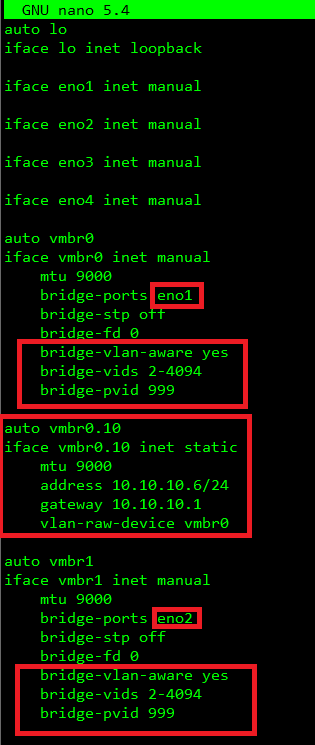
Once you have booted into ProxMox for the first time, you will need to modify the /etc/network/interfaces configuration to prepare your interfaces for the trunk port connection.
- Navigate to /etc/network/interfaces
I have four interfaces on my servers, so this is specific to me and your results may vary.
- choose a parent interface and modify the vmbro interfaces (You may have to add your own)
- Please review an example configuration below

Please take note of the screenshot. This will be different for everyone. I decided to make my parent management interface a slave to eno1. My vmbr0 is bridged to eno1 as I already stated, and because my management VLAN is 10, I made a sub-interface vmbr0.10. The bridge pvid 999 signifies my native vlan on the trunk, so any traffic not tagged will be assigned with that VLAN id. You do not have to do it this way, but I chose to do it this way. All my VMs will utilize vmbr1. I have two spare ports that I can use, but they are not necessary.
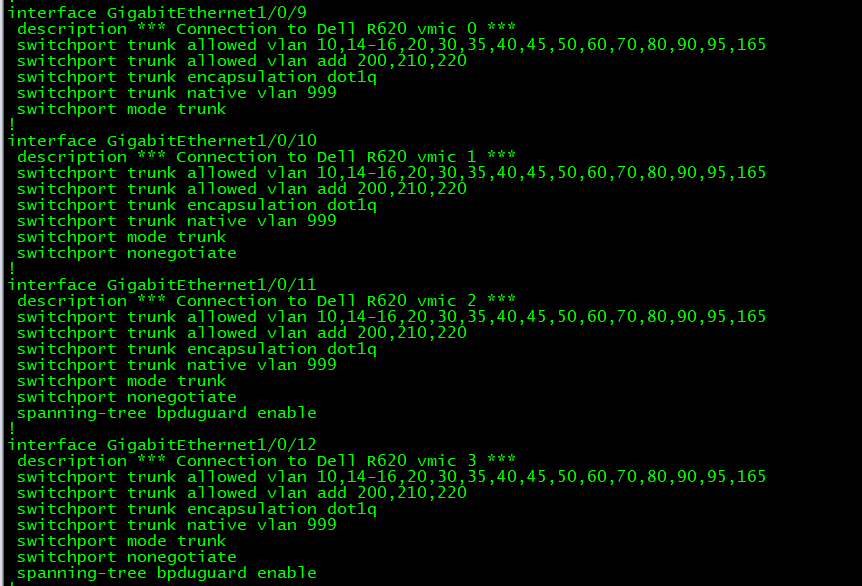
Trunk Configuration on the Cisco Switch
As you can see below, the interfaces that I am connected to are setup for native VLAN 999.


ProxMox Node/Server Specs:
- Dell r620 Chassis
- 2x – Intel(R) Xeon(R) CPU E5-2690 v2 @ 3.00GHz
- 10 Cores (20 Hyperthreading)
- Total of 40 Virtual CPUs
- 256GB RAM (DDR3 – 1866MHz)
- Raid 1 – 300GB for the OS
- Raid 5 – 6TB for VM data